Here you will learn how to install or update the DVBViewer Pro. You will also get information about the different files in the DVBViewer-folder and how to use the DVBViewer under Windows 2000/XP with a restricted user account.
The DVBViewer Pro is subject to ongoing change due to progress in research and development and thus constantly optimized. You are informed about updates by selecting info in the help menu of the DVBViewer while being connected to the internet. Information about new releases are downloaded from the DVBViewer's homepage and displayed on the screen.
contents | to the bottom | previous chapter | next chapter
At first you must install the TechniSat driver for your SkyStar 2/AirStar2/Cablestar or the corresponding TwinHan driver. In case of TechniSat cards go to the hardware manager and double-click the entry for the SS2/AS2/CS2 (network device). Now select “new driver” and point to your driver CD.
For TechniSat cards you must now install the complete TechniSat software bundled with the card. With the new driver 4.3.0 (compatible with Windows 2003 Server, no more problems with the EOL lock) TV4PC is not installed by default. Only if you want to use it (there's no need for, though) you'll have to edit the setup.ini in the directory where you unpacked the driver package (subfolder „install“) in the following way:
Change „InstallTvApp=FALSE“ to „InstallTvApp=TRUE“.
The DVB-card is bundled with the Sonic (driver versions before 4.3.0: Mediamatics (DVDExpress)) MPEG2 decoder. Its installation routine is contained in the DVBViewer TE's setup.exe file. Attention: When upgrading to the DVBViewer Pro you should not uninstall the TechniSat Edition since the MPEG2 decoder will also be uninstalled. That means you should install the Pro version to another folder (for example c:\programs\DVBViewer Pro). You can have both versions on your disk.
Now you may start the installation of the DVBViewer by executing the setup.exe. Beforehand you should
For updating it is not necessary to uninstall the DVBViewer first, since you can easily install over the old version. All settings and the channel list (optionally) are preserved.
contents | to the top | to the bottom | previous chapter | next chapter
 The Installation Process
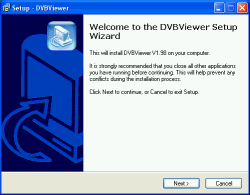
Start the installation by double-clicking setup.exe. You will be led step-by-step through the process. Now click on next.
For altering your input you can go back by clicking the back button. To abort the installation simply click on cance.
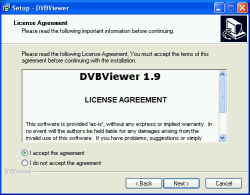
At first you must accept the license agreement by selecting I accept the agreement after you thoroughly studied it. The DVBViewer's author won't be liable for any damage caused by the program, especially in case of inappropriate or illegal use.
Now click the next button.
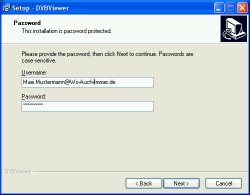
Now input your username (usually your e-mail-address) and the password you received by e-mail. Both username and password are case-sensitive. Finish with clicking on next.
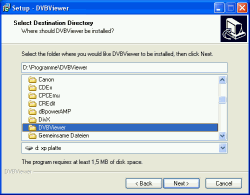
Now you must select a directory for installation of the DVBViewer. Generally this should be \program files\DVBViewer. Proceed by clicking next.
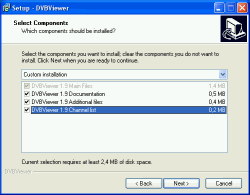
The next screen allows to select which components are to be installed. You are also informed about the space necessary for installation.
Main files are always installed, since those are imperative.
Documentation refers to this manual (only the english version at the time).
Additional files refer to the language files for different GUI languages and other supplements.
Channel list speaks for itself.
When updating, this one should not be marked.
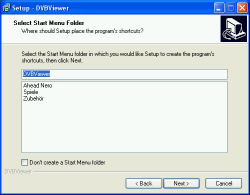
Now you can choose to create an entry for the start-menu with a new folder named DVBViewer, although you can also set any existing entry. If you don't need an entry just uncheck the box down below.
Proceed by clicking next.
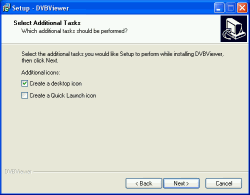
This screen allows to create a desktop or quick launch bar icon.
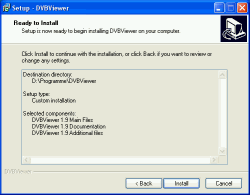
At last all chosen features will be listed. Finish the installation by clicking install.

After the successful installation you can view the documentation and/or start the DVBViewer. Finish the installation by clicking finish.
If you encounter an error message starting the DVBViewer or you don't have either video or audio, proceed to chapter 8.
contents | to the top | to the bottom | previous chapter | next chapter
This is a list of the files being installed:
contents | to the top | to the bottom | previous chapter | next chapter
The DVBViewer cannot be run in restricted user accounts under Windows 2000/XP/2003 without further ado. Proceed as follows to manually alter the corresponding access rights. Please note: The following operations may damage your system, if not applied correctly. If you feel unsure about it, ask an experienced person for help.
Log in as administrator.
Extend Registry access rights. The DVBViewer needs to write to two keys of the Windows registry. Since this is not permitted in restricted user accounts, the access rights must be extended. This is done with the program RegEdit (or RegEdit32, if available), which is located in the Windows folder. Launch it and go to the following keys:
Right-click the file, select Properties in the context menu and go to the Security tabsheet. Select Restricted users in the list in the upper part, and check the Modify box in the Allow column. Finish with OK.
Register the filters used by the DVBViewer permanently. In the DVBViewer-folder you will find the subfolder Filters, which contains files with the extension .ax. These files are registered by the DVBViewer automatically on each program start. However this is not allowed in a restricted account, resulting in error messages and malfunctions. To avoid this, proceed as follows:
Create a new subfolder in the DVBViewer folder and name it RegFilters. Move all files from the Filters subfolder to the RegFilters folder (move, not copy!).